Using Postman with Apicurio Studio
Instructions on how to set up Postman to make authenticated REST calls to the Apicurio Studio back-end API. This article is intended for developers wishing to contribute features to or integrate with Apicurio Studio.
If you are a developer trying to either contribute new back-end features to, or integrate another application with Apicurio Studio, you may find a need to use the popular REST client Postman to send REST requests to the Apicurio Studio back-end API. However, the Apicurio Studio API requires that all REST calls made to it be authenticated. By default, the quickstart is protected by Keycloak and does not allow simple BASIC authentication. Instead, an OAuth Access Token is required. This article explains how to configure Postman to retrieve this access token and include it in the REST request.
Getting Set Up
This article assumes you have the Apicurio Studio quickstart downloaded and running on your localhost. If you haven't done that yet, go to the Apicurio Studio Download page and grab (and install and run) the latest quickstart.
Additionally, this article assumes you already have Postman installed and running. The rest of this article deals with how to configure Postman to make authenticated REST calls to Apicurio Studio.
Create a Request (System Status)
Let's start by creating a new request to retrieve the Apicurio Studio's system status. This is a convenient endpoint to use because, like all endpoints, it requires authentication information to work and it simply returns some basic system status information.
The endpoint we're going to use is:
http://localhost:8080/api-hub/system/status
Once you've created this request in Postman, click the Send button and make sure you receive an "Unauthorized" error message from the server. This of course will occur because we haven't included any authentication credentials in the request!
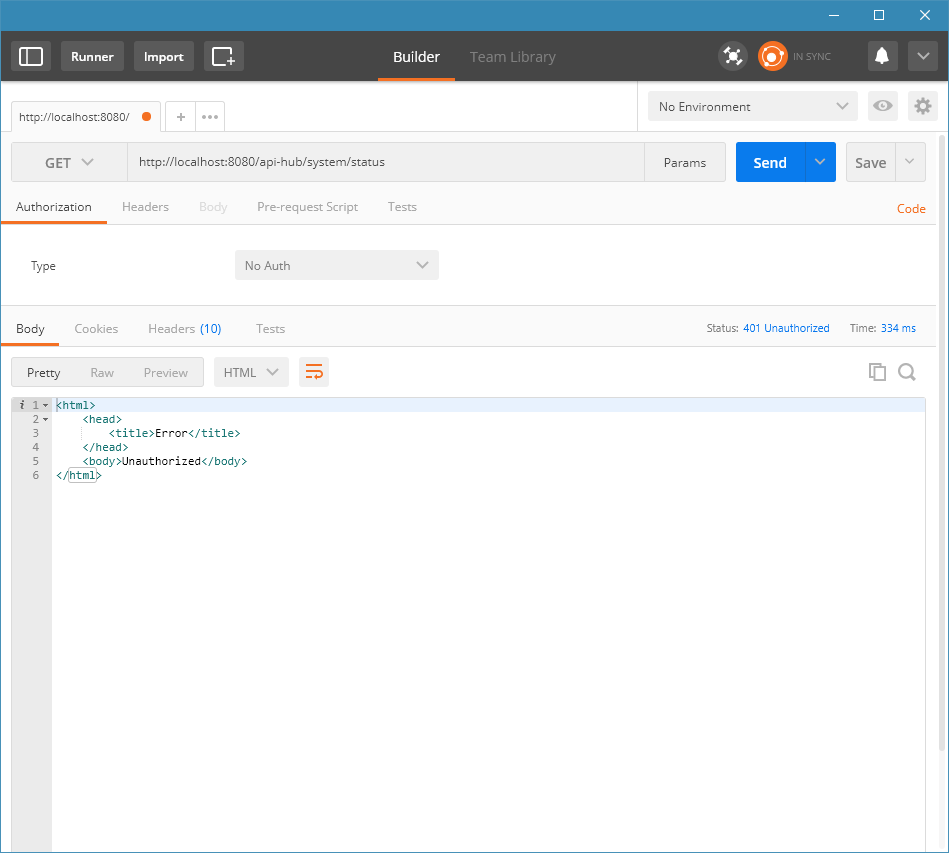
Unauthorized!
Configure OAuth 2.0 Authorization
On the Authorization tab for your request, click the Type drop-down and choose "OAuth 2.0". This will result in a list of Existing Tokens that can be applied to the request. At this point you don't have any tokens, so the list will be empty. Go ahead and click the Get New Access Token button and fill out the resulting form with the following information:
| Form Field | Value |
|---|---|
| Token Name | Apicurio API (localhost) |
| Auth URL | https://studio-auth.apicur.io/auth/realms/apicurio-local/protocol/openid-connect/auth?redirect_uri=https://www.getpostman.com/oauth2/callback&response_type=code&client_id=apicurio-studio |
| Access Token URL | https://studio-auth.apicur.io/auth/realms/apicurio-local/protocol/openid-connect/token |
| Client ID | apicurio-studio |
| Client Secret | |
| Scope (Optional) | |
| Grant Type | Authorization Code |
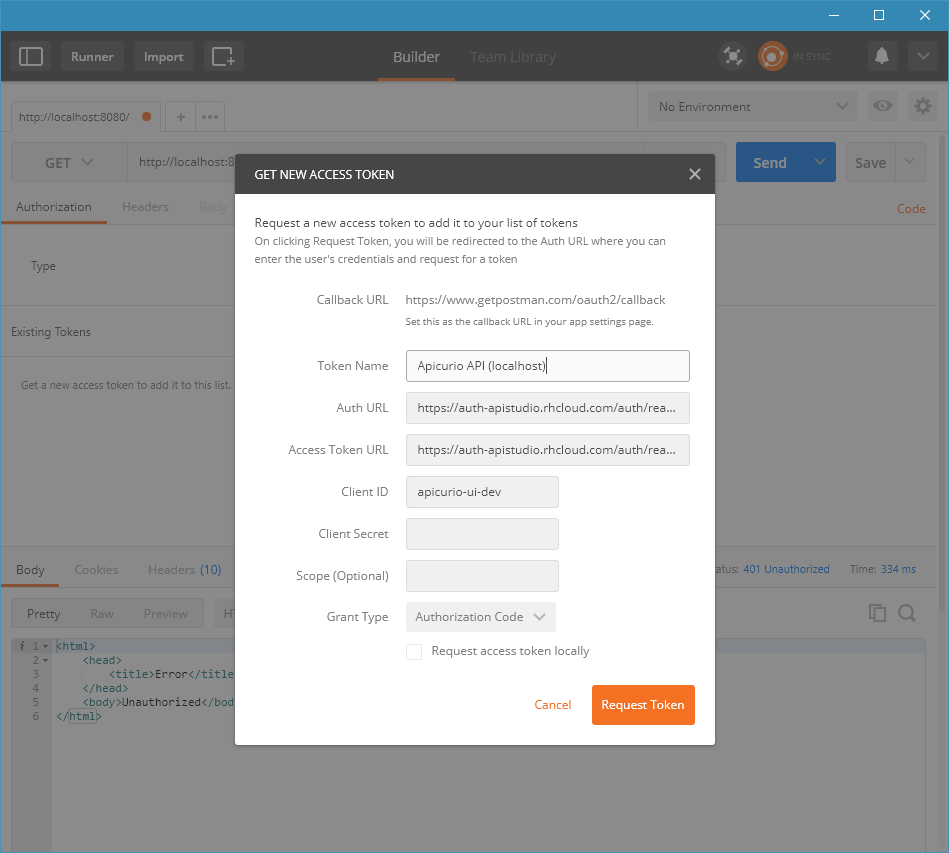
Get New Access Token
Once you've filled out the form, click on the Request Token button. This should open up a new window so that you can login. Use the same information as you would when logging in to the Apicurio UI.
If the login process goes well, you should get a new entry in the Existing Tokens area, and it will be labeled Apicurio API (localhost).
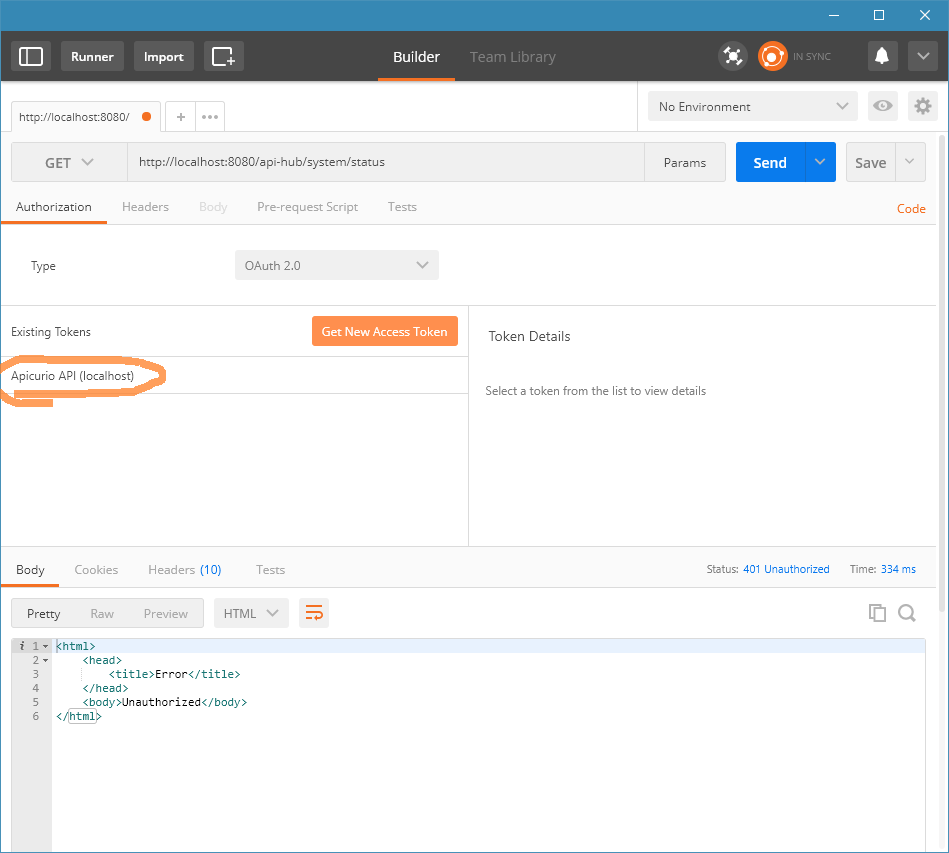
Login Success, Token Added
Make an Authenticated Request
Now that you have a valid access token, it's time to apply it to the system status request. Click the Apicurio API (localhost) token to bring up the details of the access token. Make sure the Add token to drop-down is set to "Header", then click the Use Token button. This will add a new "Authorization" header (you can see it in the Headers tab) to the request, with the value of the access token.
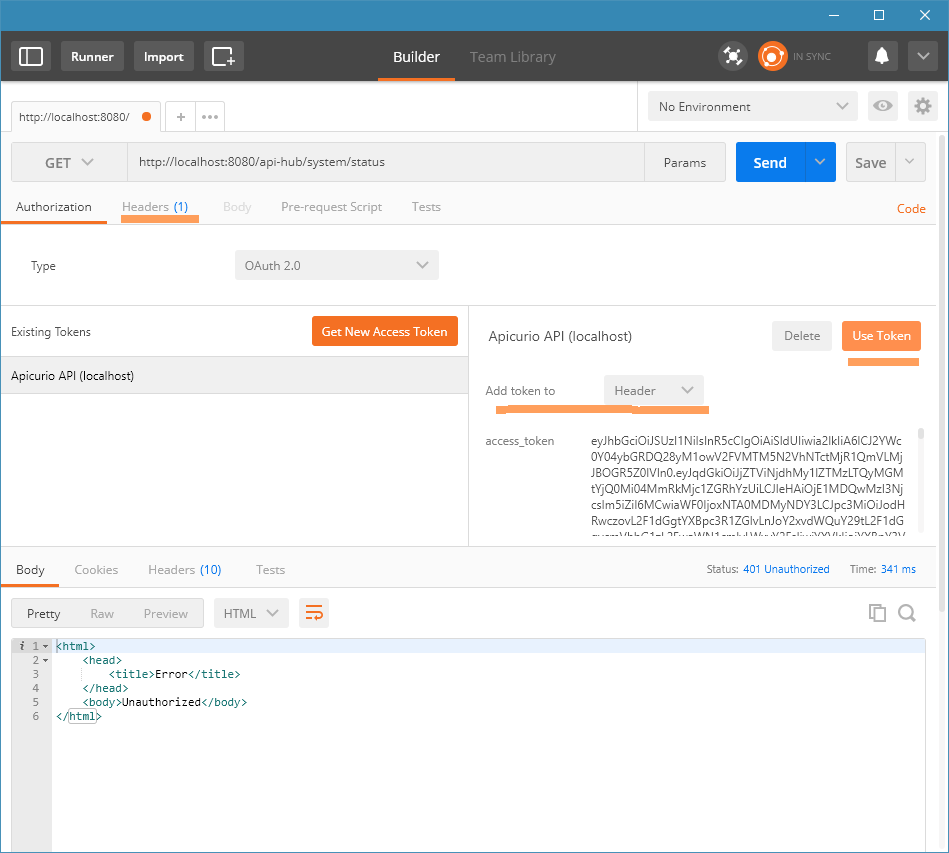
Token Applied to Request
Now that the authentication credentials have been added to the request, go ahead and click Send again to see if it works!
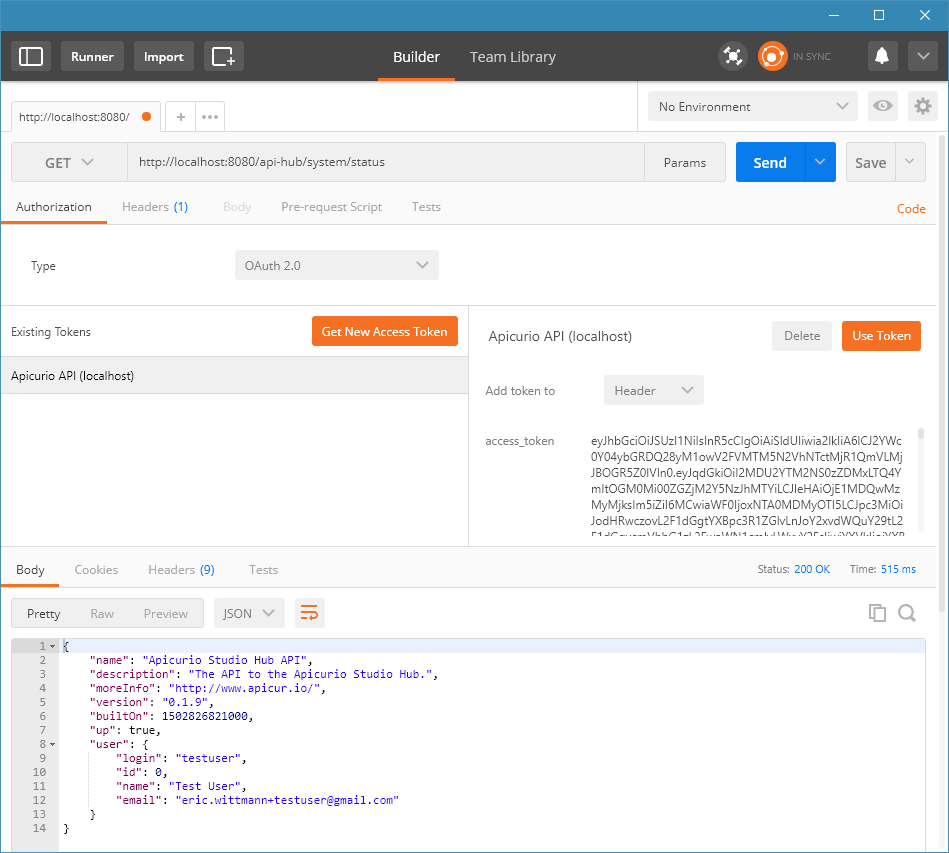
Authenticated Request Success
Access Token Longevity
Note that access tokens are only valid for a few minutes, so you will need to Delete and then re-add the access token when it expires.
Updated almost 7 years ago
